


Navigation:
→ Anatomy of Ring
→ Ring Size Chart
→ Stone Setting Styles
Anatomy of a Ring
Simplistically, the ‘anatomy’ of a ring refers to its many different and variable characteristics. Not all will be applicable to your design, but by giving you the knowledge, you will then be able to critically analyse ring components. In doing so, you will be able to discuss your dream vision with more confidence and understanding.
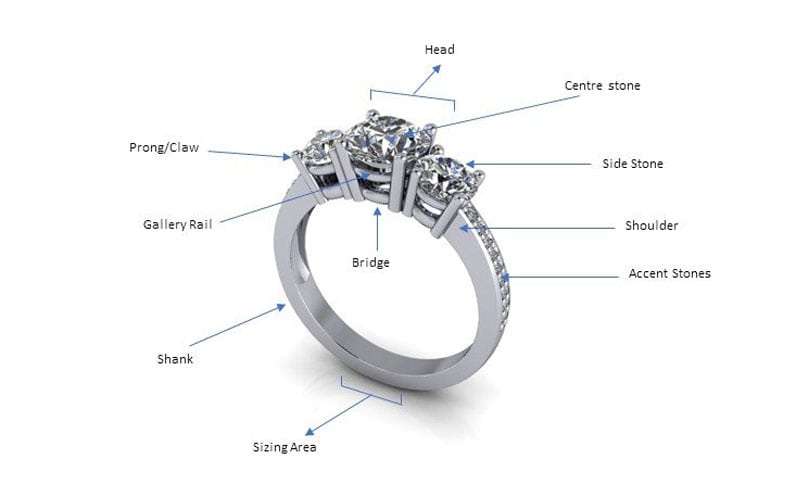
Centre Stone: The centre stone of your ring is the focal point of the design, it’s where your chosen gemstone will rest in all of its glory.
Head: The head of the ring is what holds your chosen centre stone safely and securely into place whether it is a prong/claw setting or a bezel setting.
Prong/Claw: The prong/claw of a ring is part of the setting that is pushed over the gemstone to hold it into place securely. The amount of claws that are pushed over is designated by the design of the setting.
Side Stone: With a ring design that has more than one gemstone within it, for example a trilogy style ring. The gems that rest either side of the centre gem in the trilogy are known as the side stones.
Gallery Rail: Adding structure to the ring and strength to the setting of the gemstone, a gallery rail always recommended to secure your gemstones safety and security.
Bridge: The bridge in a ring follows the finger rail underneath the head of the ring to provide strength and structure to the piece, also allow the ring to sit comfortably on your finger.
Shoulder: The shoulder of the ring is the point at which the shank of the ring meets the head of the ring.
Accent Stones: Gemstones set down the shoulder of the ring shank are known as accent stones. Allowing you to add your personal style the the shank of the ring.
Shank: The shank is the band of the ring, available in many profiles to match your personal style
Sizing Area: It’s always recommended to have at the base of the ring shank, an area where in the future, if necessary, the ring can be sized. In the case of a design that follows the whole circumference of the band, for example a fully diamond set eternity ring, it’s not possible and other methods to size will be required.
Why Is It Important?
We at Durham Rose want to increase your education on ring knowledge. In doing so, when you are ready to design your forever piece, you can do so feeling empowered and ready to let your creative vision take centre stage.
“Anatomy Of A Ring: If you have ever wondered what the head, or the shoulder of a ring is, let our jewellery experts share their knowledge with you on the ‘Anatomy of a Ring’.”
→ Return to Top
Ring Size Chart
Why Is It Important?
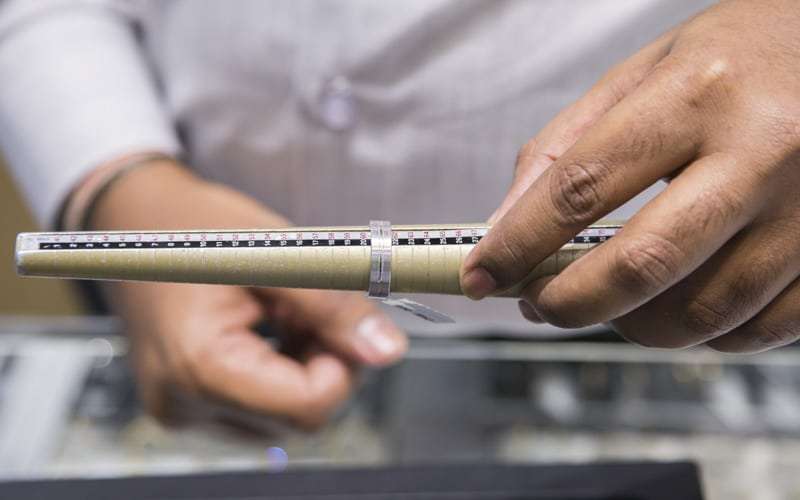
Knowing the finger size before the design process begins is crucial so that accurate pricing can be quoted. Metal is quoted per gram, so having a clear idea of how much metal will be within the design helps us provide an accurate quote to each client.
Another reason why it is key to know the finger size before the design process begins, is sometimes designs can be restricted by how small or large the finger size is. Knowing as much information before initiating the design helps the process of creating your dream ring run smoothly.
In the common event that it will be difficult to retrieve the finger size for your partner, we can create the desired ring in an average finger size or pass on ideas on how to retrieve a close estimate of your partners finger size, being aware of the likelihood that the ring may need to go into one of our workshops for resizing.
Ring Size Chart
| Inside Diameter | Inside Circumference | Sizes | |||||||
| MM | Inches | MM | Inches | British & Australian | US & Canada | French & Russian | German | Japanese | Swiss |
| 9.91 | 0.390 | 31.13 | 1.22 | – | 0000 | – | – | – | – |
| 10.72 | 0.442 | 33.68 | 1.39 | – | 00 | – | – | – | – |
| 11.53 | 0.454 | 36.22 | 1.43 | – | 0 | – | – | – | – |
| 11.95 | 0.474 | 37.54 | 1.49 | A | 1/2 | – | – | – | – |
| 12.18 | 0.482 | 38.26 | 1.51 | A 1/2 | 3/4 | – | – | – | – |
| 12.37 | 0.487 | 38.86 | 1.53 | B | 1 | – | – | 1 | – |
| 12.60 | 0.496 | 39.58 | 1.56 | B 1/2 | 1 1/4 | – | – | – | – |
| 12.78 | 0.503 | 40.15 | 1.58 | C | 1 1/2 | – | – | – | – |
| 13.00 | 0.512 | 40.84 | 1.61 | C 1/2 | 1 3/4 | – | – | – | – |
| 13.21 | 0.520 | 41.50 | 1.63 | D | 2 | 41 1/2 | 13 1/2 | 2 | 1 1/2 |
| 13.41 | 0.528 | 42.13 | 1.66 | D 1/2 | 2 1/4 | – | – | – | – |
| 13.61 | 0.536 | 42.76 | 1.68 | E | 2 1/2 | 42 3/4 | 13 3/4 | 3 | 2 3/4 |
| 13.83 | 0.544 | 43.45 | 1.71 | E 1/2 | 2 3/4 | – | – | – | – |
| 14.05 | 0.553 | 44.14 | 1.74 | F | 3 | 44 | 14 | 4 | 4 |
| 14.15 | 0.557 | 44.45 | 1.75 | F 1/2 | 3 1/8 | – | – | – | – |
| 14.25 | 0.561 | 44.77 | 1.76 | F 3/4 | 3 1/4 | – | – | – | – |
| 14.36 | 0.565 | 45.11 | 1.77 | G | 3 3/8 | 45 1/4 | – | 5 | 5 1/4 |
| 14.45 | 0.569 | 45.40 | 1.79 | G 1/4 | 3 1/2 | – | 14 1/2 | – | – |
| 14.56 | 0.573 | 45.74 | 1.80 | G 1/2 | 3 5/8 | – | – | 6 | – |
| 14.65 | 0.577 | 46.02 | 1.81 | H | 3 3/4 | 46 1/2 | – | – | 6 1/2 |
| 14.86 | 0.585 | 46.68 | 1.84 | H 1/2 | 4 | – | 15 | 7 | – |
| 15.04 | 0.592 | 47.25 | 1.86 | I | 4 1/4 | 47 3/4 | – | – | 7 3/4 |
| 15.27 | 0.601 | 47.97 | 1.89 | I 1/2 | 4 1/2 | – | 15 1/4 | 8 | – |
| 15.40 | 0.606 | 48.38 | 1.90 | J | 4 5/8 | 49 | 15 1/2 | – | 9 |
| 15.53 | 0.611 | 48.79 | 1.92 | J 1/4 | 4 3/4 | – | – | – | – |
| 15.70 | 0.618 | 49.32 | 1.94 | J 1/2 | 5 | – | 15 3/4 | 9 | – |
| 15.80 | 0.622 | 49.64 | 1.95 | K | 5 1/8 | 50 | – | – | 10 |
| 15.90 | 0.626 | 49.95 | 1.97 | K 1/4 | 5 1/4 | – | – | – | – |
| 16.00 | 0.630 | 50.27 | 1.98 | K 1/2 | 5 3/8 | – | – | 10 | – |
| 16.10 | 0.634 | 50.58 | 1.99 | L | 5 1/2 | 51 3/4 | 16 | – | 11 3/4 |
| 16.30 | 0.642 | 51.21 | 2.02 | L 1/4 | 5 3/4 | – | – | – | – |
| 16.41 | 0.646 | 51.55 | 2.03 | L 1/2 | 5 7/8 | – | – | – | – |
| 16.51 | 0.650 | 51.87 | 2.04 | M | 6 | 52 3/4 | 16 1/2 | 12 | 12 3/4 |
| 16.71 | 0.658 | 52.50 | 2.07 | M 1/2 | 6 1/4 | – | – | – | – |
| 16.92 | 0.666 | 53.16 | 2.09 | N | 6 1/2 | 54 | 17 | 13 | 14 |
| 17.13 | 0.674 | 53.82 | 2.12 | N 1/2 | 6 3/4 | – | – | – | – |
| 17.35 | 0.683 | 54.51 | 2.15 | O | 7 | 55 1/4 | 17 1/4 | 14 | 15 1/4 |
| 17.45 | 0.687 | 54.82 | 2.16 | O 1/2 | 7 1/4 | – | – | – | – |
| 17.75 | 0.699 | 55.76 | 2.20 | P | 7 1/2 | 56 1/2 | 17 3/4 | 15 | 16 1/2 |
| 17.97 | 0.707 | 56.45 | 2.22 | P 1/2 | 7 3/4 | – | – | – | – |
| 18.19 | 0.716 | 57.15 | 2.25 | Q | 8 | 57 3/4 | 18 | 16 | 17 3/4 |
| 18.35 | 0.722 | 57.65 | 2.27 | Q 1/2 | 8 1/4 | – | – | – | – |
| 18.53 | 0.729 | 58.21 | 2.29 | Q 3/4 | 8 1/2 | – | 18 1/2 | 17 | – |
| 18.61 | 0.733 | 58.47 | 2.30 | R | 8 5/8 | 59 | – | – | 19 |
| 18.69 | 0.736 | 58.72 | 2.31 | R 1/4 | 8 3/4 | – | – | – | – |
| 18.80 | 0.740 | 59.06 | 2.32 | R 1/2 | 8 7/8 | – | – | – | – |
| 18.89 | 0.748 | 59.34 | 2.35 | R 3/4 | 9 | – | 19 | 18 | – |
| 19.10 | 0.752 | 60.00 | 2.36 | S | 9 1/8 | 60 1/4 | – | – | 20 1/4 |
| 19.22 | 0.757 | 60.38 | 2.38 | S 1/4 | 9 1/4 | – | – | – | – |
| 19.31 | 0.760 | 60.66 | 2.39 | S 1/2 | 9 3/8 | – | – | – | – |
| 19.41 | 0.764 | 60.98 | 2.40 | S 3/4 | 9 1/2 | – | 19 1/2 | 19 | – |
| 19.51 | 0.768 | 61.29 | 2.41 | T | 9 5/8 | 61 1/2 | – | – | 21 1/2 |
| 19.62 | 0.772 | 61.64 | 2.43 | T 1/4 | 9 3/4 | – | – | – | – |
| 19.84 | 0.781 | 62.33 | 2.45 | T 1/2 | 10 | – | 20 | 20 | – |
| 20.02 | 0.788 | 62.89 | 2.48 | U | 10 1/4 | 62 3/4 | – | 21 | 22 3/4 |
| 20.20 | 0.797 | 63.46 | 2.50 | U 1/2 | 10 1/2 | – | 20 1/4 | 22 | – |
| 20.32 | 0.800 | 63.84 | 2.51 | V | 10 5/8 | 63 | – | – | 23 3/4 |
| 20.44 | 0.805 | 64.21 | 2.53 | V 1/4 | 10 3/4 | – | – | – | – |
| 20.68 | 0.814 | 64.97 | 2.56 | V 1/2 | 11 | – | 20 3/4 | 23 | – |
| 20.76 | 0.817 | 65.22 | 2.57 | W | 11 1/8 | 65 | – | – | 25 |
| 20.85 | 0.821 | 65.50 | 2.58 | W 1/4 | 11 1/4 | – | – | – | – |
| 20.94 | 0.824 | 65.78 | 2.59 | W 1/2 | 11 3/8 | – | – | – | – |
| 21.08 | 0.830 | 66.22 | 2.61 | W 3/4 | 11 1/2 | – | 21 | 24 | – |
| 21.18 | 0.834 | 66.54 | 2.62 | X | 11 5/8 | 66 1/4 | – | – | 26 1/4 |
| 21.24 | 0.836 | 66.73 | 2.63 | X 1/4 | 11 3/4 | – | – | – | – |
| 21.30 | 0.839 | 66.92 | 2.64 | X 1/2 | 11 7/8 | – | – | – | – |
| 21.49 | 0.846 | 67.51 | 2.66 | Y | 12 | 67 1/2 | 21 1/4 | 25 | 27 1/2 |
| 21.69 | 0.854 | 68.14 | 2.68 | Y 1/2 | 12 1/4 | – | – | – | – |
| 21.89 | 0.862 | 68.77 | 2.71 | Z | 12 1/2 | 68 3/4 | 21 3/4 | 26 | 28 3/4 |
| 22.10 | 0.870 | 69.43 | 2.73 | Z +1/2 | 12 3/4 | – | – | – | – |
| 22.33 | 0.879 | 70.15 | 2.76 | Z+1 | 13 | – | 22 | 27 | – |
| 22.60 | 0.890 | 71.00 | 2.80 | Z+1.5 | 13.5 | – | – | – | – |
| 22.69 | 0.893 | 71.28 | 2.81 | Z+2 | – | – | – | – | – |
| 22.92 | 0.902 | 72.00 | 2.83 | Z+2.5 | – | – | – | – | – |
| 23.06 | 0.908 | 72.45 | 2.85 | Z+3 | – | – | – | – | – |
| 23.24 | 0.915 | 73.01 | 2.87 | Z+3.5 | – | – | – | – | – |
| 23.47 | 0.924 | 73.73 | 2.90 | Z+4 | – | – | – | – | – |
| 23.55 | 0.927 | 73.98 | 2.91 | Z+4.5 | – | – | – | – | – |
| 23.87 | 0.940 | 74.99 | 2.95 | Z+5 | – | – | – | – | – |
| 24.27 | 0.956 | 76.25 | 3.00 | Z+6 | – | – | – | – | – |
Taken from: http://www.ringsizes.co/resources.html
→ Return to Top
Setting Styles
Your Forever Piece, Set In Style
What Is A Prong/ Claw Setting?
The term ‘Prong’ is utilised by American jewellery retailers and ‘Claw’ within the U.K jewellery sector. Prong or claw settings are the most common and popular way to show off your gemstone. The claw grips the stone around its girdle and hold it securely into place whilst showing off as much of the gemstone as practically possible, raising it above the shank becoming the focal point of your engagement ring. This setting is perfect for a delicate design piece.
4 Prongs/ Claw
Many engagement rings favour the classic 4 claw setting style. Adaptable to any gemstone shape or size, the 4 claws offer the most visibility of the gemstone without compromising the security. Some would argue a round stone with 4 claws can give off the illusion of the gemstone looking squarer. Maximising visibility of your gemstone allows your gemstone to be the centre of attention and for a high-performance diamond to truly show off its beauty.
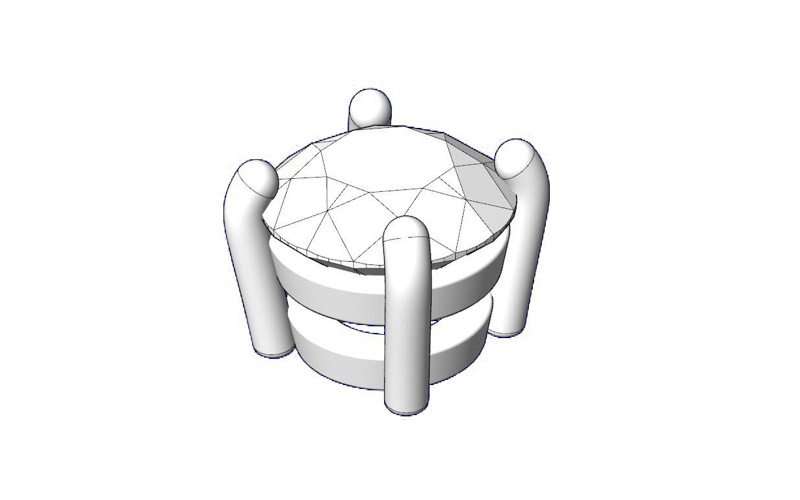
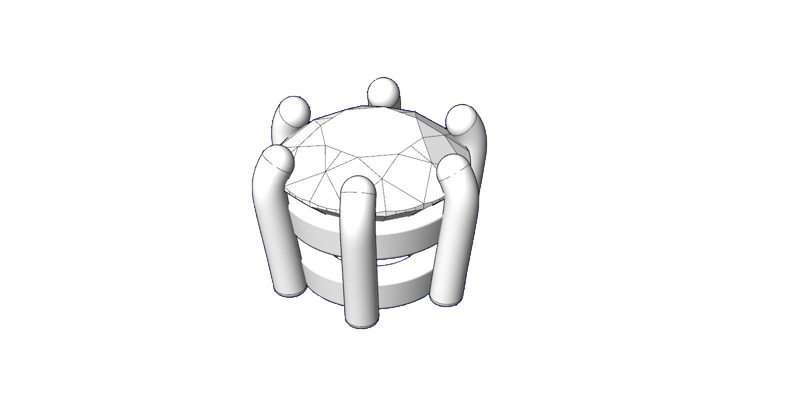
6 Prongs/ Claw
Having your gemstone, especially round cut and set in in 6 claws, creates a more rounded shape around the stone with commonly smaller prongs evenly spread around the girdle of the gemstone. If security of the gemstone, especially in a larger size, is a main concern then having 6 claws around the stone will provide more support but as a result the visibility of the stone will be somewhat compromised in comparison.
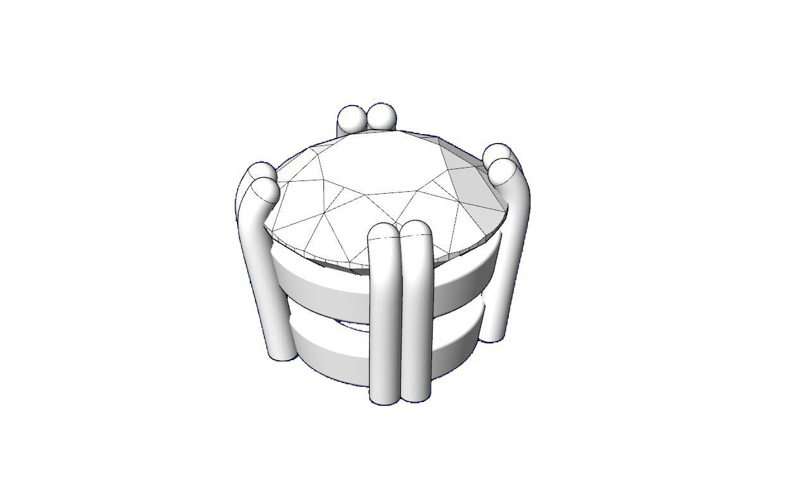
Double Prong/ Claw
Having a double claw setting (based upon the 4 claw frame) creates a more ‘antique’ looking setting for your gemstone. Adaptable for all shapes, double claws are a great compromise if you are torn between aesthetics and security. The genuinely smaller claws are nestled closely next to each other allowing a lot of the stone to be visible meaning your high-performance diamonds can excel, whilst securing the gemstone firmly. This is a common choice for a larger gemstone.

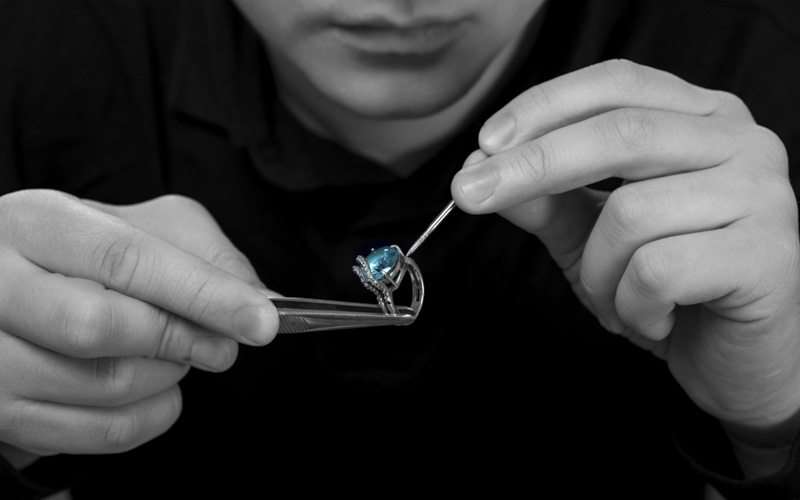
Bezel/ Rub Set
For someone with a practical lifestyle, the bezel set gemstone could be the perfect choice. Adaptable for any gemstone shape, the bezel setting perfectly encases the stone within a wall of metal protecting the vulnerable girdle. The security of your gemstone is maximised along with visibly enlarging the stone. For a softer gemstone such as, Emerald or Opal, setting in a bezel style setting protects a majority of the stone which allows to wearer to be confident in wearing the piece on a daily basis. Without claws to catch onto some fabrics the bezel setting is the most secure way to hold your gemstone. Surrounding your gemstone in a wall of metal will increase the weight of the piece; a larger stone will need more metal to create a bezel setting therefore, increasing the overall price of the piece.
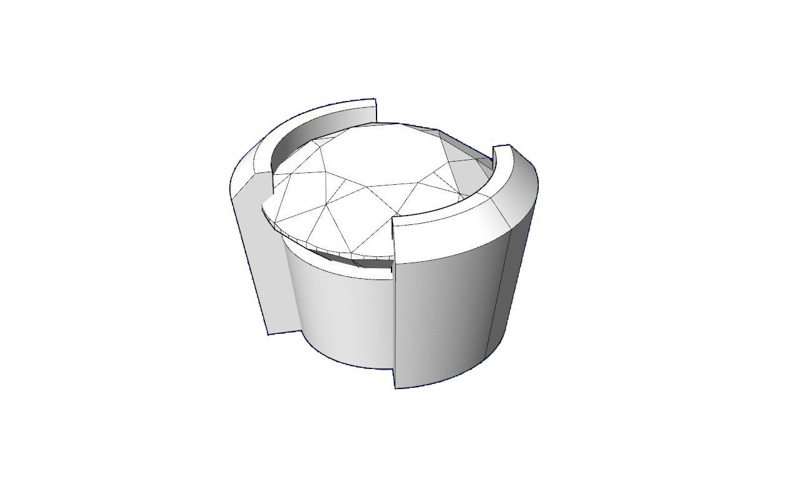
Partial Bezel/Rub Set
The advantage of the half bezel/rub setting is that it does not cover the entire stone like the full bezel, only partially. This allows part of the gemstone to be visible to the eye while still ensuring the majority of the stone is secure. For a style of ring where claws are not the ideal requirement and security is, a partial bezel setting is a great choice if you would still like to have the gemstone on show as much as possible. Having a partial bezel setting will bring down the weight of the setting in comparison to a full bezel setting, therefore lowering the price of the metal and overall piece.
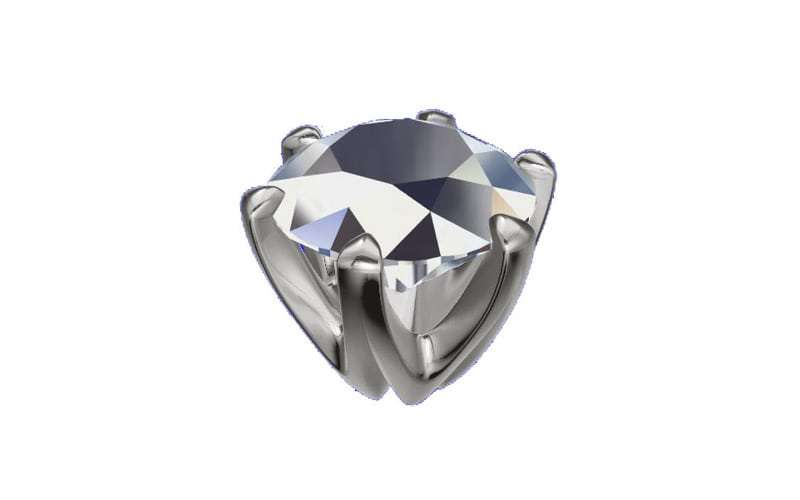
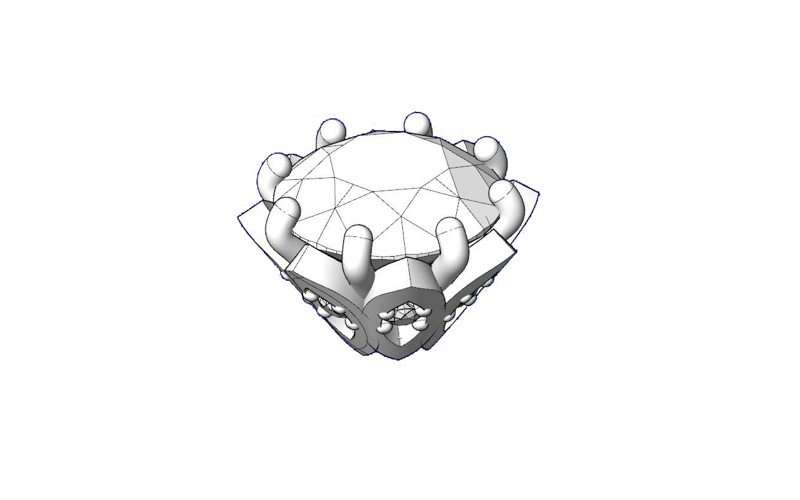
Rex/ Crown
The style of the Rex setting is based upon the design of a crown. The name Rex comes from the Latin for ‘King’, raising your gemstone above the shank of your ring as the centre of attention. The setting style is instantly recognisable with 6-8 claws usually tapering from the top downwards toward the finger, even spaced around your gemstone firmly encasing the stone. Its unique design is very popular with designs of a more vintage look, often matched with a tapering shank.
Decorative
Adaptations of the rex/crown collet have becoming increasingly popular within the more contemporary designed pieces. Collets that represent a floral inspired design have also been used to set gemstones in engagement rings. The strength that the common 6 claw design enables, allows decorated designs to be created without compromising the security of the stone.
→ Return to Top